Creating a Twilio Notification Gateway in Kentico
Creating notifications in Kentico is a great way to automate communications and keep users informed. Site visitors will want these notifications in a number of ways, including email, SMS, and other alerts. In this article, I’ll show you how to create a notification gateway to alert users using SMS with Twilio.
Overview
Kentico has a lot of out-of-the-box functionality to allow you to notify users easily when content is updated. The Content Subscription web part enables you to add a form to your page quickly and allow the user to be notified any time the content is created, updated, or deleted. This is especially useful for e-commerce sites that may want to inform users when a new product is released.
You can view the example in the documentation here.
In this blog, I wanted to take this a step further and show you how to build a more “generic” notification system that could be used to alert users over SMS. For the functionality, I wanted to leverage Twilio, which is about as easy as it gets for sending messages to mobile devices.
You can find out more about Twilio here.
Set Up
For the demo, I started with the Dancing Goat demo site. For my purposes, any site would have worked fine, but I already had it set up, so it made a nice starting point. Also, I hadn’t read any interesting facts about coffee yet, so my life was feeling a little incomplete. The last planning step was to decide what I wanted to do. In my demo, I decided I wanted to notify users every time the Home page is updated because that is a totally logical and common need (well, it’s easy for me to demonstrate at least!). With those decisions in place, I was ready to start my development.
1. Creating the Notification Gateway Form
The first step was to create a new custom notification form for my notification form. This control would have a single textbox which would accept the mobile phone number of the user that is to be used for the notification.
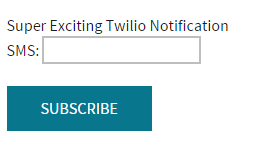
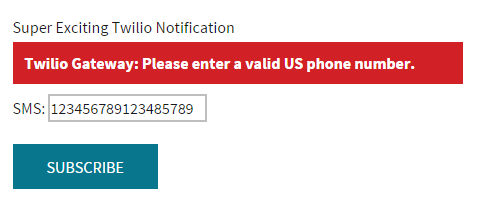
This user control inherits from the CMSNotificationGatewayForm class, which includes a Validate function. In this function, I added some RegEx validation to ensure the user entered a correct phone number. In my example, I am only accepting 10-digit US phones.
public override string Validate()
{
    Regex regexPhoneNumber = new Regex(@"^\(?([0-9]{3})\)?[-. ]?([0-9]{3})[-. ]?([0-9]{4})$");

    if (!regexPhoneNumber.IsMatch(this.txtSMS.Text.Trim()))
    {
        return "Please enter a valid US phone number.";
    }
    return String.Empty;
}
You can find out more about creating a notification gateway form here.
2. Creating the Notification Gateway Class
The next step was to create the Notification Gateway class. This is the class that will hold my Twilio integration. I created it within my Old_AppCode/Custom folder (because I’m using a Web App).
public class TwilioNotificationClass : CMSNotificationGateway
{
     /// <summary>
    /// Returns the notification gateway form.
    /// </summary>
    public override CMSNotificationGatewayForm GetNotificationGatewayForm()
    {
        return null;
    }

    /// <summary>
    /// Sends the notification via SMS.
    /// </summary>
    public override void SendNotification()
    {
    }
}
You can find out more about creating a Notification Gateway class here.
Note that I added the RegisterCustomClass attribute to the class, so it will get loaded when the application starts.
[assembly: RegisterCustomClass("TwilioNotificationClass", typeof(Custom.TwilioNotificationClass))]
3. Adding the Twilio Integration
Once my new class was in place, I added the Twilio integration. This involved bringing in the Twilio NuGet package. After that, it was a few simple lines of code to make the Twilio service call.
//Integrate with Twilio
var twilio = new TwilioRestClient(strTwilioAccountSid, strTwilioAuthToken);
var message = twilio.SendMessage(strTwilioFromNumber, "+1" + this.NotificationSubscriptionObj.SubscriptionTarget, this.Resolver.ResolveMacros(templateText.TemplatePlainText), "");
Be sure you format your phone numbers correctly for Twilio to accept them (see the "+1").
You can find out more about the Twilio API here.
4. Registering the Twilio Gateway
The next step was to register my new notification gateway. This will allow the gateway to be selectable in my notification web part.
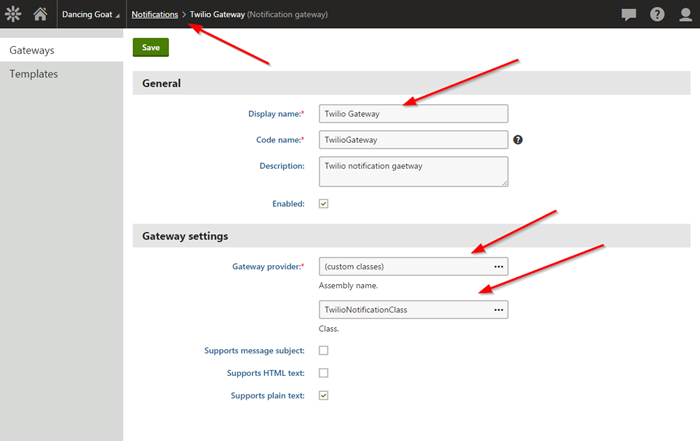
This was a straightforward process that is laid out in the document here.
5. Creating the Notification Template
The final development item was to create my notification template. This template will be used to format the SMS message to the user. I included the user’s name to personalize the message for the user.
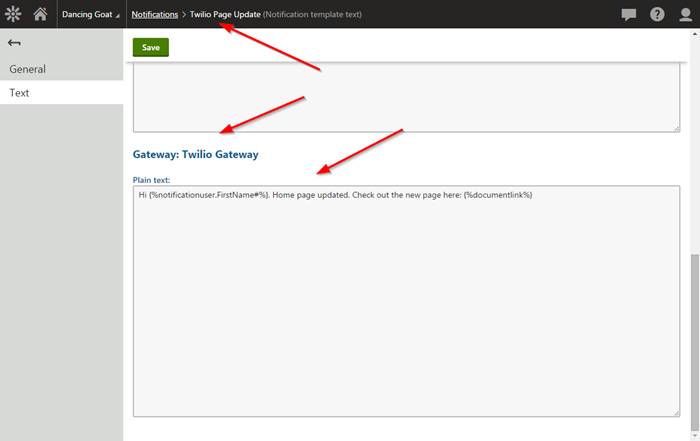
Note that the notification template UI will display a section for each registered notification gateway. Be sure to enter the appropriate values in the correct gateway.
You can find out more about notification templates here.
6. Adding the Notification Subscription Web Part
To implement the new notification gateway, I added the Notification Subscription web part to the Home page. I configured it to use the Twilio notification gateway and passed the correct values.
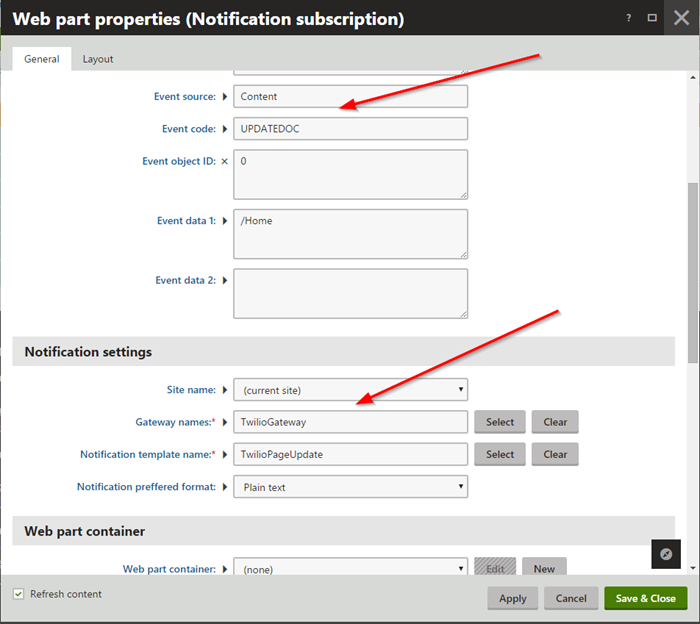
I chose this web part over the Content subscription web part because I wanted more control over the process. Be sure you select the correct control for your needs. I did use the CS web part initially, which helped me determine which values I needed to set in the NS web part for it to work properly.
You can find out more about the Content subscription web part here.
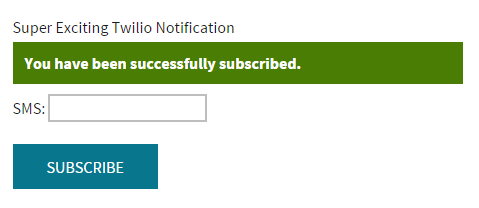
7. Testing
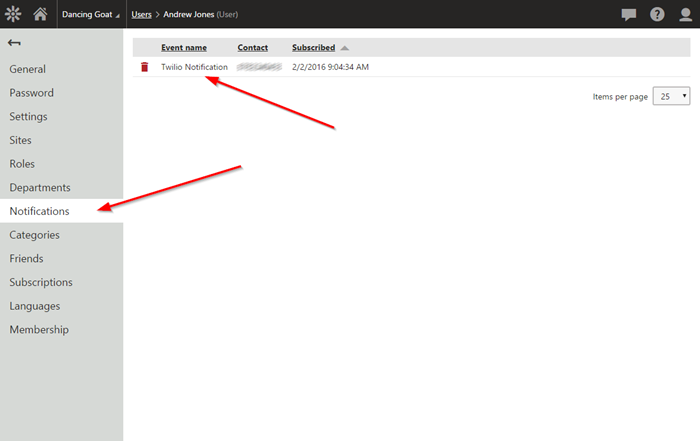
After all of the pieces were in place, I was ready to test the functionality. I accessed the site as “Andy” and entered my mobile number into the notification gateway form.
I confirmed that the appropriate notification was registered to Andy’s account.
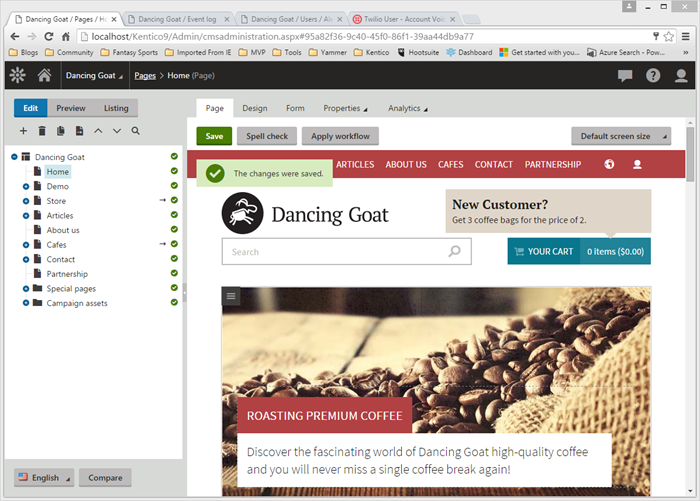
I then accessed the Home page in the Content module and updated the text.
I then received the SMS message on my mobile phone. (Yes, I like my Windows Phone)

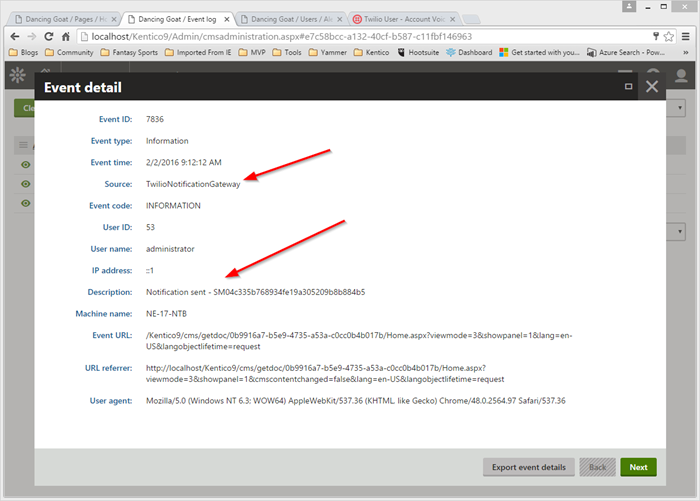
I also confirmed the successful notification by viewing the Event Log for the Notification Sent entry.
Moving Forward
As you can see in this blog, there are a lot of possibilities when it comes to notifications with Kentico. With the implementation of a Notification Gateway, you can keep your users up to date on content changes, new products, and blog entries with a simple interface. Leveraging a third-party system like Twilio can enable you to send SMS messages and other forms of communication easily.
In my demo, I did a simple content update to show the functionality. It would be very easy to use the Kentico API to trigger a notification based on a Global Event Handler or another event if your needs required it.
I hope this blog helps you understand how notifications can be created in Kentico. Good luck!
Get the Code
This blog is intended for informational purposes only and to provide an example of one of the many ways to accomplish the described task. Always consult Kentico Documentation for best practices and additional examples that may be more effective in your specific situation.