Creating a Lorem Ipsum Generator Macro in Kentico
Kentico has many macros that come with the system to do all sorts of things. From formatting dates to viewing system properties, macros provide a convenient way to execute a block of code and get the results quickly. If the built-in macros don’t fit your needs, there’s a simple process to create your own functionality. In this blog, I’ll show you how I created a Lorem Ipsum Generator macro for use within my site.
Over the last 7+ years of developing with Kentico, I can say that nearly every project I’ve worked on required some sort of custom code. Whether it was a custom module, web part, or just a section of code, I often needed some particular functionality that was out of the norm. One of the most useful ways to implement this type of code is through the use of Custom Macros. By leveraging the macro engine, you can easily write code once and then reference it throughout the site.
UPDATE
After publishing, I found out that Kentico does, in fact, already have a lorem ipsum macro. This blog can still show you how to add your own macros and incorporate them into your site!
How you ask? Let me walk you through the process.
1. Decide how you want to code your macros
Before you ever start coding, you need to decide how you want to structure your macros. Sometimes this may mean a specific class for each type of macro (string macros, CRM macros, etc.) that you need. Other times, you may be able to code them all as a single class, which cuts down on your searching when you need to figure out what’s throwing up that strange exception.
For my code, I decided a single file would do me just fine, largely in part because I have a single macro to add. You will need to look at your code structure and determine which setup is best for you. Either way, you are going to go through the same process when you register your code.
2. Create a custom macro method class
After deciding how to structure the macros (macro in my case), the next step was to create a custom macro method class. This is a pretty simple process that is detailed in the documentation.
You can see this process here.
public class CustomMacroMethods : MacroMethodContainer
The macros methods are contained within a MacroContainer class. This helps Kentico understand what methods are associated with each class, and helps with the registration.
For each macro method, you need to decide a couple of things.
- Does your macro accept any parameters?
- Are you going to allow any overrides?
- What information about the method would you like to tell the users (in the macro autocomplete help)?
For my method, I would accept a single parameter that denotes how many paragraphs of text I am generating.
public static object GenerateLoremIpsum(EvaluationContext context, params object[] parameters)
{
    {
        // Branches according to the number of the method's parameters
        switch (parameters.Length)
        {
            case 1:
                // Overload with one parameter
                LipsumGenerator generator = new LipsumGenerator();
                return generator.GenerateLipsumHtml(ValidationHelper.GetInteger(parameters[0], 1));
            default:
                // No other overloads are supported
                throw new NotSupportedException();
        }
    }
}
In the implementation function, I leveraged the NLipsum NuGet package to generate my text. This was a simple C# library for generating text that I had found.
You can find out more about the NLipsum NuGet package here.
3. Decide how your method will be implemented
After creating your method class, you need to decide how it will be implemented. Custom macros can be registered for different object types. For some macros, you may want to register them for String objects so that appear as an option for developers when working with them. For my needs, I had a “stand alone” macro that I wanted to use throughout the site, so I did not need to register my container with any other type.
If you would like to have the macro available for a particular type, then add the appropriate assembly attribute for each type.
[MacroMethod(typeof(string), "Generates lorem ipsum text.", 1)]
[MacroMethodParam(0, "param1", typeof(int), "Number of paragraphs to generate.")]
4. Creating the Macro Namespace
With the above code completed, the macro methods would be available for any type they were registered for. In my scenario, I wanted the macros to “stand alone”, meaning I wanted them to be selectable anywhere macros are used (without having a particular type of object already selected). In order to implement this, I created a Macro Namespace to associate my method class with. This namespace is essentially a wrapper for the class and allows Kentico to reference it.
[Extension(typeof(CustomMacroMethods))]
public class CustomMacroNamespace : MacroNamespace<CustomMacroNamespace>
{
}
In the Namespace class, you reference the Macro Methods class that you want to “wrap”. Additionally, you can also reference any Custom Macro Fields you may have implemented.
You can find out more about Macro Namespaces here.
5. Register the Macro Namespace class
The last piece to implement was to register the macro namespace within the system. For this process, I leveraged the CMSModuleLoader partial class and the MacroContext.GlobalResolver API.
public override void Init()
{
    // Registers "CustomMacroNamespace" into the macro engine
    MacroContext.GlobalResolver.SetNamedSourceData("CustomMacroNamespace", CustomMacroNamespace.Instance);
}
This code registers my Macro Namespace with the macro engine, which in turn registers my macros methods in the system. This will allow them to be selectable anywhere macros are used.
6. Testing
With my code in place, I was ready to test my text generator. I leveraged the Console in System / Macros to test my macro.
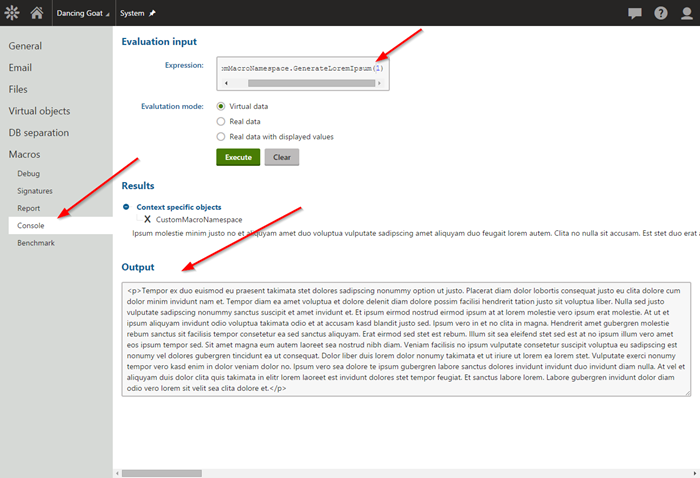
You can see the console also provides a description of the parameter to help the developer understand the functionality.
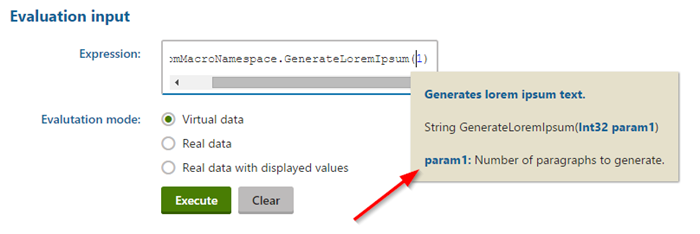
If you aren’t familiar with the Macro Console, it allows for real-time testing of macros throughout the system. This is a great way to test your code and ensure everything is working properly.
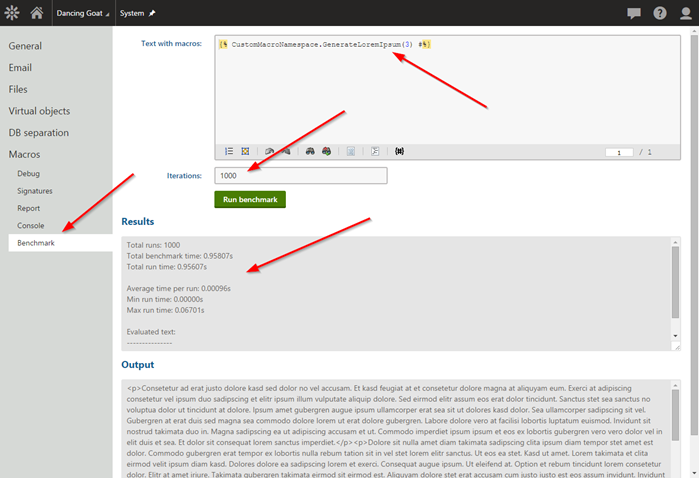
7. Performance testing
As part of my testing, I wanted to make sure my macro was not impacting on the functioning of the site too much. In System / Macros, there is a handy utility called Benchmark. This utility allows you to execute a particular macro for X number of times and see the results. This is a great way to ensure you aren’t introducing code that could severely impact on the performance of the site.
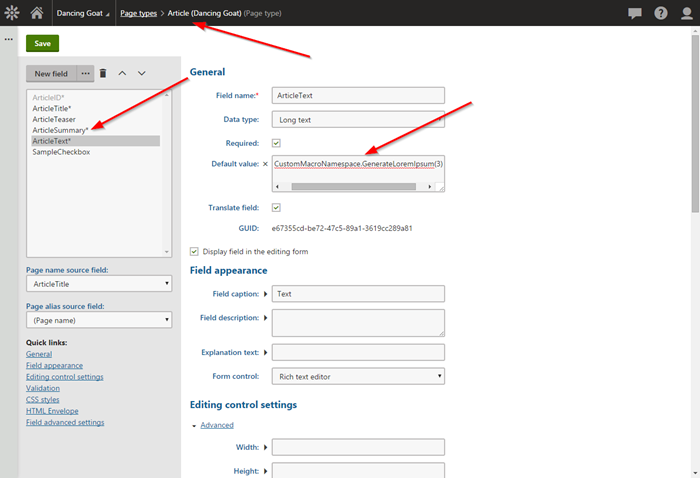
8. Adding the macro to the site
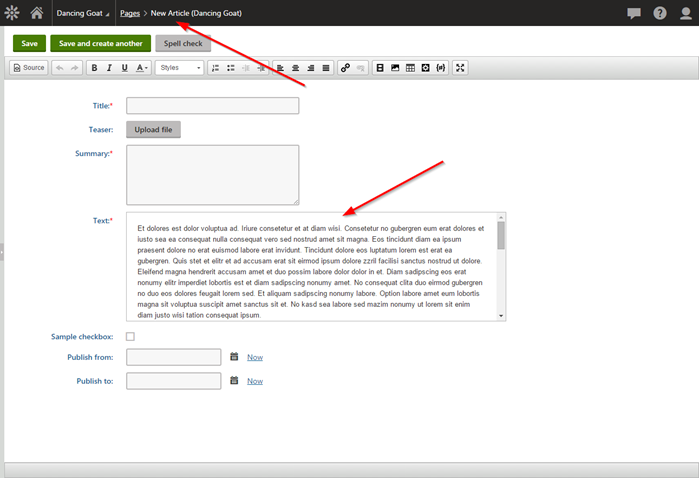
Now that I knew my macro was registered correctly and returning the correct data, I was ready to implement it in my site. Because this macro is all about generating sample text, I decided to make it be the default value for any new Articles created in the site. This would allow an editor to see what the content would look like, without actually having to write any text.
Wrapping Up
Hopefully from this blog, you can see how easy it is to implement custom macros within your site. Macros are a great way to organize your custom functions in a reusable format. Good luck!
Get the code
This blog is intended for information purposes only and provides an example of one of the many ways to accomplish the described task. Always consult Kentico Documentation for the best practices and additional examples that may be more effective in your specific situation.