Automating Kentico Continuous Integration with TeamCity and GitHub
In this article, I will give you an overview of how you can set up a Kentico website to build and deploy changes with TeamCity and GitHub automatically.
Prerequisites
For the purposes of this article, I'm working with a fresh Kentico 9 instance that was installed as a website rather than a web application. Most of the information in the article is not specific to the project’s version of Kentico or type, but when they are, I will note it. I am using GitHub as a repository host and TeamCity version 10 for the build server.
Getting Kentico into GitHub
In order to automate our build process, the first step is to prepare our Kentico instance for source control. The first thing you'll want to do is make sure you have at least a basic Kentico site set up. In my case, I added a homepage with an editable text web part, configured the license keys and domain aliases for my local and build server environments, and configured a few settings. Next, you should remove the sensitive data from your web.config by following the guide in my previous article: Storing web.configs in Source Control Safely. After this, you'll want to add a gitignore file to the project root based on another previous article of mine: Gitignore for Kentico. With both of these in place, you are ready to create a new repository in GitHub and initialize and push your project to that GitHub repository. Once this is done, follow the steps in the documentation to set up Kentico's continuous integration (CI) feature. One thing that is easy to miss in the documentation is that we recommend disabling the team development and versioning features (see the documentation for details) as they can lead to odd behavior when used in conjunction with CI. It is also worth pointing out that you should carefully review the current limitations mentioned there. Once you have carefully read that page and have configured your site for CI, you'll want to commit all the new files that were generated to the repository and push them to GitHub. You will also want to take a backup of your local database for later use as this is used as the seed for a new developer or environment. You should also regularly update this database seed backup to synchronize the items that are not trackable in CI.
Summary
- Install Kentico and set up the basics of your site (master page, homepage, users, licenses, domains, etc.)
- Prepare the web.config to be stored safely in source control
- Add a Kentico gitignore
- Create a new repository in GitHub
- Initialize and push your project to that GitHub repository
- Set up Kentico's CI feature
- Push CI changes to the GitHub repository
- Back up the database (this is used as a seed and should be updated regularly as some objects are not trackable in CI)
Setting up the automated build server
TeamCity setup
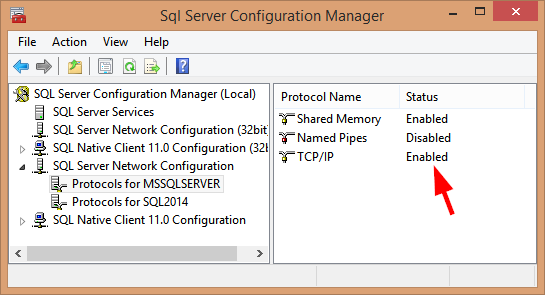
In this example, I am simplifying deployment by combining the build server with the integration server. In my case, that means that the TeamCity server and build agent are on the same server as the IIS server I am deploying to. Your integration environment will need to have access to a SQL server for both TeamCity and the integrated build site. The integration server will need to meet all the requirements for your site as far as IIS version and modules, .NET framework versions, etc. are concerned. Once you have configured the server with the necessary requirements, you will need to download and install TeamCity according to their documentation. In my case, since my build server and integration server are combined, I installed TeamCity to port 90 rather than the default port 80, which IIS needs. Additionally, make sure that you use Microsoft SQL Server for the TeamCity database as the built-in database is not intended for production use. You will need to follow their instructions for setting up the Microsoft JDBC driver, and if you run into a connection refused error, you may need to enable TCP/IP in SQL server configuration manager:
IIS setup
You will also need to set up an IIS site for your automated build deploy. There is nothing special to take into consideration here.
There are also a number of pre-built custom build steps you will want to add to TeamCity. TeamCity calls these pre-built custom build steps meta-runners. I have created a few custom meta-runners to make continuous integration easier with Kentico projects. Additionally, I'm using one that JetBrains built as a dependency. Let's take a moment to understand what each of these meta-runners does. If you do not plan to use these meta-runners or just want to keep going with the setup, you can skip to the next section, Adding the meta-runners.
Create text file
This is the meta-runner from JetBrains. It is part of the meta-runners power pack they've published on GitHub. It accepts two parameters: the file’s contents and the path with the file name. It does exactly what you expect: creates the specified file with the specified content. When we set up the build for our project, this is not used directly but rather is used by the next meta-runner, the Create Sensitive Config Files meta-runner.
Go to GitHub to get the "Create Text File" meta-runner
Create sensitive config files
This meta-runner depends on the Create Text File meta-runner. It accepts two parameters: the CMSConnectionString and CMSHashStringSalt values that are to be used in the ConnectionStrings.config and AppSettings.config files that are necessary based on us setting up our web.config to be safely stored in source control. Essentially, it calls the Create Text File meta-runner twice. The content for each is the same as the ConnectionStrings.Template.config or AppSettings.Template.config except that the value has a TeamCity parameter for the value to output. If your config templates are different from the ones in the previously mentioned article (e.g., you added additional keys to the AppSettings.config or used different names), you'll need to modify this meta-runner's source accordingly.
Go to GitHub to get the "Create sensitive config files" meta-runner
Copy Kentico DLLs
This meta-runner assumes that you're including the Lib directory, but not the CMS\bin directory based on the gitignore file from the previous article. It is based on the built in command line runner type and has custom command line script to copy the contents of the Lib and Lib/Azure directories to the CMS\bin directory. If you store your copies of the Kentico DLLs somewhere else, you can modify the source of this meta-runner to pull from that location.
Go to GitHub to get the "Copy Kentico DLLs" meta-runner
Deploy CMS directory
This meta-runner takes one parameter: the target root directory you want to copy the site files to. This will be the full path to the directory that IIS is pointing to and must be on the same machine as the agent that is running the build. The meta-runner is based on the built-in command line runner type and has a custom script that does the following:
- Copies the App_Offline.htm_ from the CMS directory in the repository to the target root directory
- Renames that to App_Offline.htm to take the site offline
- Copies the contents of the CMS directory to the root directory (new and changed files only)
- Deletes the App_Offline.htm file in the root directory to bring the site back online
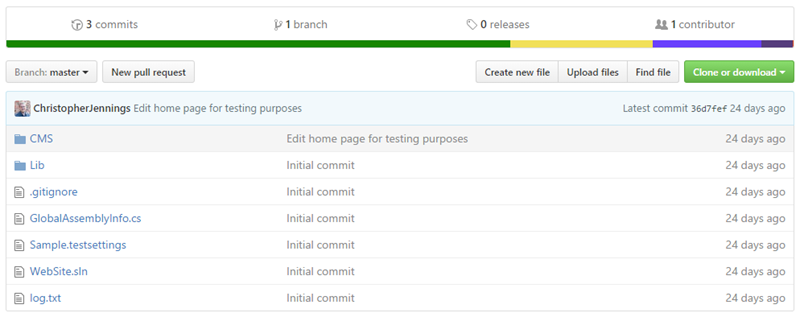
This meta-runner assumes that you've checked in your project root (not CMS directory) to the repository root, as seen here:
 Go to GitHub to get the "Deploy CMS directory" meta-runner
Kentico continuous integration restore
This meta-runner takes one parameter: the root directory you want to copy the site files to. This will be the directory that IIS is pointing to and must be on the same machine as the agent that is running the build. The meta-runner is based on the Powershell runner type and contains the Powershell script published in the documentation for performing a CI restore.
Go to GitHub to get the "Kentico continuous integration restore" meta-runner
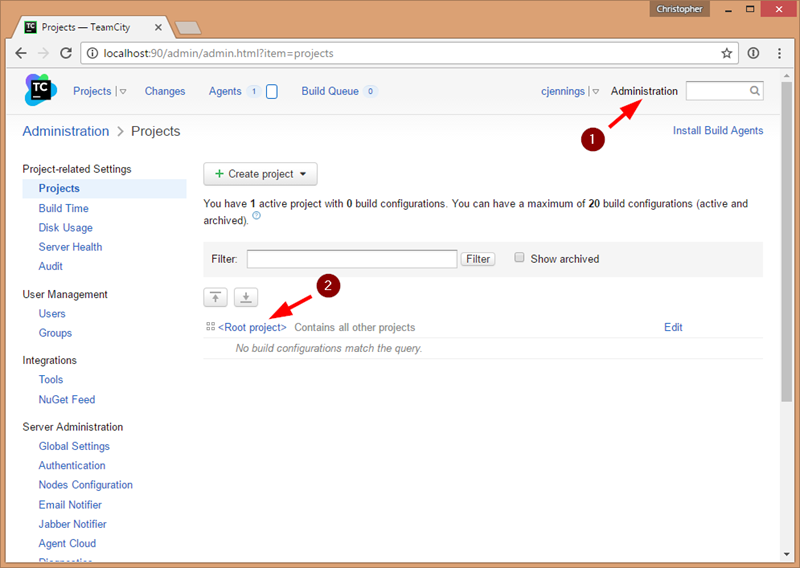
Now that you understand what each of them does, you'll need to add them to your TeamCity server. First, download them from the links above, then navigate to Administration, followed by <Root Project>:
 Choose Meta-Runners, then click the "Upload Meta-Runners" button. Finally, click "Choose file" and browse to the meta-runner XML file you want to upload, select it, and save the meta-runner.
Setting up the project
First, follow the instructions TeamCity provides for adding a project from GitHub. At the end of this, TeamCity will detect a Visual Studio build step automatically. If you have a web application project you will want to use this step. If you have a web site project, click on "Build steps" again to ignore this and add your own build steps. From here, the process is fairly simple. Add the meta-runners and set their parameters in the following order:
- Copy Kentico DLLs (re-order this before the Visual Studio build step if you have a web app)
- Create Sensitive Configs (Kentico)
CMSConnectionString should be the full connection string for the deployed buildCMSHashStringSalt should be the project's hash string salt value (usually a GUID)
- Deploy CMS Directory (Kentico)
DeployRootDirectory should be the full path to the IIS site root you set up
- Kentico Continuous Integration Restore (optional—only add if you want to perform a CI restore as part of the build)
DeployRootDirectory should be the full path to the IIS site root you set up
If everything is setup correctly, you should be ready to hit the "Run" button. After the build successfully completes, you should be able to access the IIS site, and everything should work fine other than missing images and other files stored in media libraries since those are usually excluded from source control. To get these working, you'll either need to use shared storage for the instance or deploy the media items separately another way.
Wrap-up
We covered a lot here, and this is really one of the simplest versions of doing this kind of build and deploy. You might choose to integrate some automated testing, deploy to remote servers, or incorporate additional requirements, such as NuGet packages or external libraries. The possibilities are truly endless, and it's just a matter of taking the time to implement them.