Automatically Schedule export process for backups
Typically when a document or object is permanently deleted from Kentico via the user interface, you need to restore a backup copy of the entire database in order to restore the single document or object that was inadvertently deleted, and usually needs to be performed via the hosting company, or site admin. A backup copy of the site in the form of an export package can usually achieve the same results without having to restore an entire database, and you can even choose which objects to re-import, however most clients only create a backup of the database as there is no automated way to create a site export package. This article will show you how to create a custom scheduled task to create a nightly or weekly backup of your site in the form of an export package, and how to allow a non global admin to import these export packages.
In order to achieve this result, we will be using the built in scheduler and creating a custom scheduled task using the Export API method. While this may sound intimating if you have never created a custom scheduled task or used our API before, you can download the appropriate code files and simply configure the tasks as described later on in this article.
First we need to create the task by defining the scheduled task code in the
~/App_Code folder and loading this class via the API. While there are other ways of adding a new task, this example will ensure Kentico automatically compiles the task for you. If you would prefer to define your own task, you can follow the example on this link -
devnet.kentico.com/docs/devguide/scheduling_a_custom_code.htm - and add the code from the provided code files. The two example code files, AutoExport.CS and CLassLoader.CS files can be
downloaded here, and need to be placed in the
~/App_Code folder and a few changes need to be made; otherwise you would only export the default corporate site.
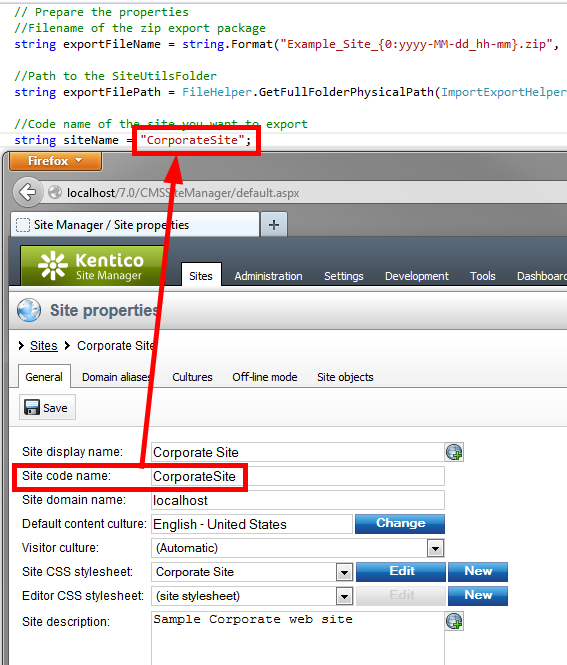
//Filename of the zip export package
string exportFileName = string.Format("Example_Site_{0:yyyy-MM-dd_hh-mm}.zip", DateTime.Now);
You can edit the name of the exported file by changing the text inside the quotes, but I would recommend leaving the current date in the file name and only editing the text in red.
//Code name of the site you want to export
string siteName = "CorporateSite";
The text in red is referring to the site code name in Site Manager -> Sites -> your site -> Site code name, and must match in order for the site to be exported.
Once you have added these files to your
~/App_Code folder and updated the
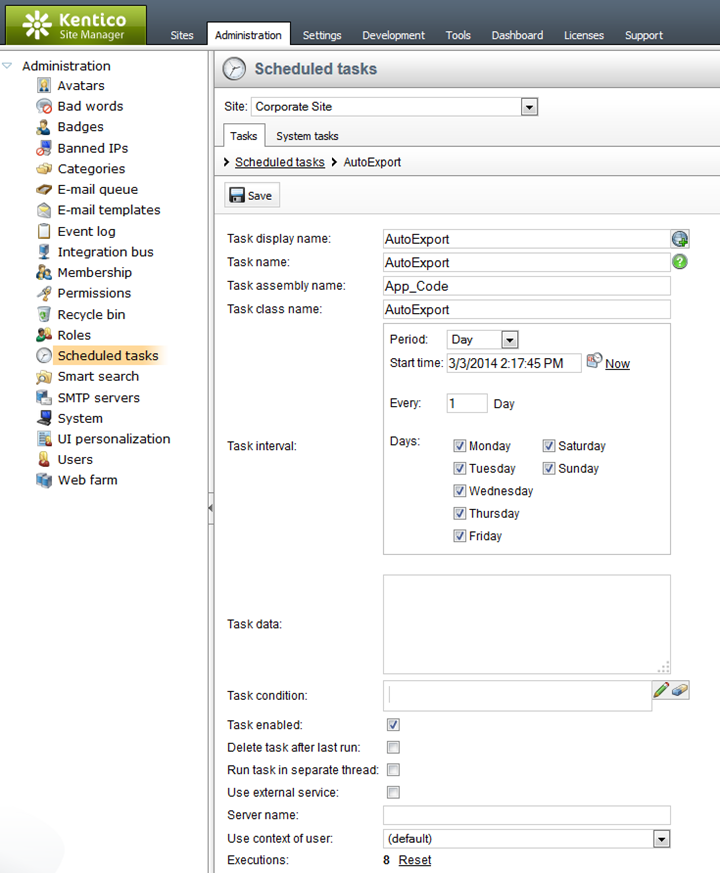
siteName value, you can create the task within the Kentico UI. This can be done via Site Manager -> Administration -> Scheduled tasks -> New task and filling in the following properties
Task display name: AutoExport – this is the name of the task in the task listing, you can use anything here.
T ask name: AutoExport
Task assembly name: App_Code
Task class name: AutoExport
Task Interval: set when you want this task to be executed
Task enabled: checked
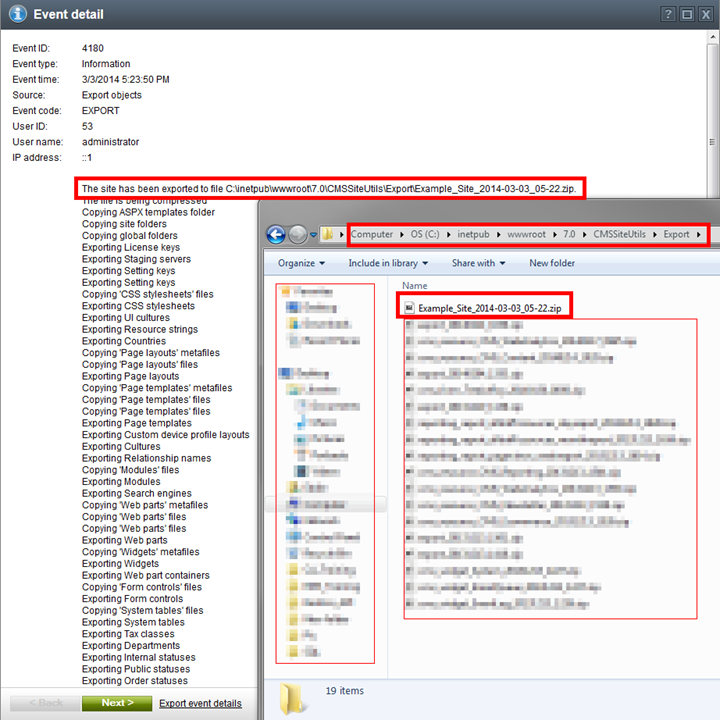
This task will produce an export package for the specified site, place this package in the default ~\CMSSiteUtils\Export folder with a file name of
Example_Site_<CurrentDate>.zip, and add an event to the event log showing the output from the export process.
Once the process is completed, you could use a third party tool like Dropbox to sync the file to another location outside of your project folder. In addition to creating a site export package, you could use the API to only target specific objects within a site export or only export specific objects as described here -
devnet.kentico.com/docs/devguide/export_import_api_examples_overview.htm - using the same task as our example.
This task will run in the context of a global administrator and could consume a fair amount of resources depending on the size of your site, so it would be best to run this task during your site’s off peak hours.
Now that we have the export packages being automatically created, maybe you would like to allow a non global admin to import one of these backup export packages. The problem with this is, only global administrators can perform the import process as you need access to Site Manager. In this case we can use the Import API to create a custom web part which can be placed on any page within the CMS Desk and allow the user to perform the import process. You can download the
Import web part and import this web part into your site ensuring you check the
Import files (recommended) option during Step 3 of the import process.

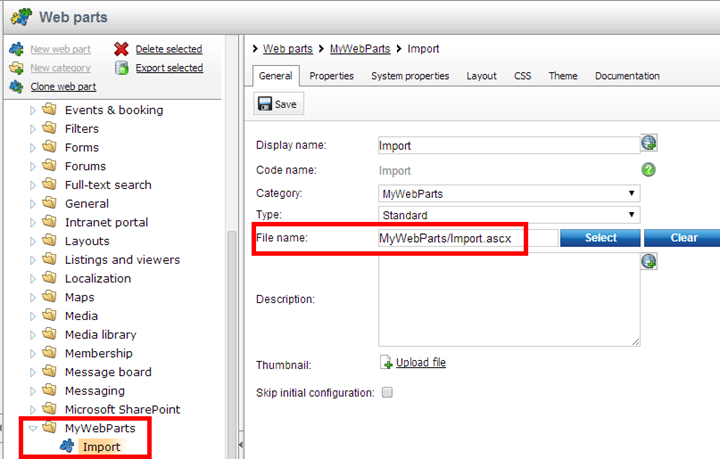
The web part will then be imported and create the ~\CMSWebParts\MyWebParts\Import.ascx(.cs) file. Once the web part has been added to your CMS you can add this web part to any page in the CMS Desk, and If you edit the web part properties you can see a few attributes that must be filled in:
Site display name: Display name for the imported site
Site code name: Code name for the imported site
Site domain: Domain name for the imported site
Website path: Path to the location of the export package. The application must have access to this location, and you must end the path with a trailing slash
Export file name: Name of the export file. The application must have access to this file and it must end in the .zip extension.
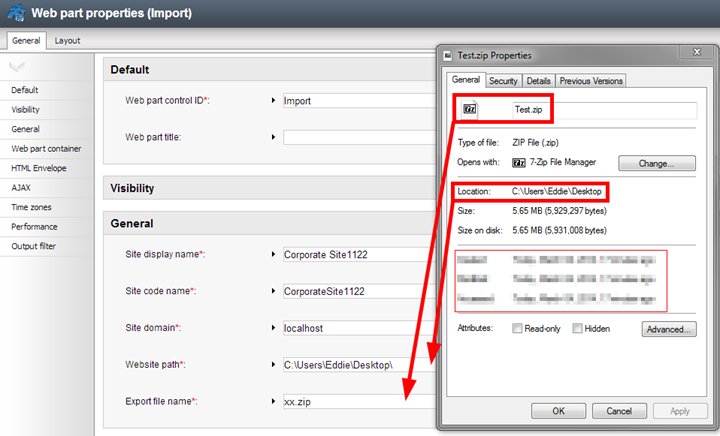
After you have entered the correct values, you can click the Import button to start the import process.
If you choose to add this web part and implement this functionality, I strongly suggest you place security restrictions on this page to prevent unauthorized access to this web part. Please also note that this web part will not overwrite an existing site as it will only create a new site with similar data, which the user could use to copy the deleted document data or gain access to the previously deleted object from the imported site. If you are looking to target a specific object, I recommend using the normal import module via Site Manager and selecting your specific objects.