Adding a TeamUp Form Control to Kentico
Many companies utilize SaaS applications for managing parts of their business. Calendar and scheduling products like TeamUp are great for administrating your corporate events and keeping everyone and everything on schedule. Here at Kentico, we use TeamUp for a number of internal processes, including managing our blog release schedule. In this blog, I will show you how you can create a form control to integrate with TeamUp to sync your events to a specific calendar.
Overview
For this blog, I will be integrating a TeamUp calendar into the Blogging module for Kentico. The idea is that authors will be able to create a new blog article and then have it posted directly to TeamUp using the blog post data. This would save authors a little bit of time when entering a blog, but more importantly, ensure that all of the blogs are entered in the TeamUp calendar. So let’s get to it!
Creating the form control
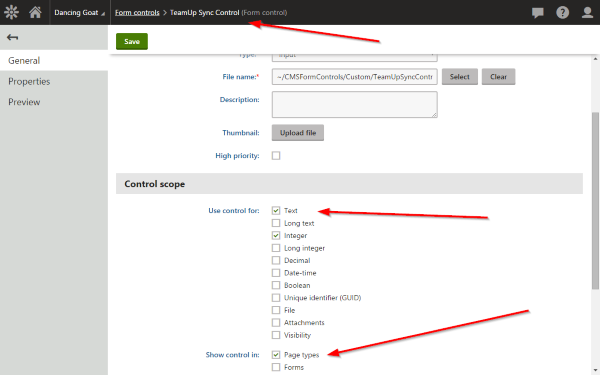
The first step in the process is to create a custom form control for our integration. The reason I chose this method is to have the process as simple as possible by having it on the Form tab for the blog post. This will allow authors to enter their post and then sync the data to TeamUp. I need to make sure I set the right data types where the form control to be used. In my example, I chose Text and Integer and will show the control for Page types.
New Form Control
The Kentico documentation has a great example of making a custom form control. You can check it out here.
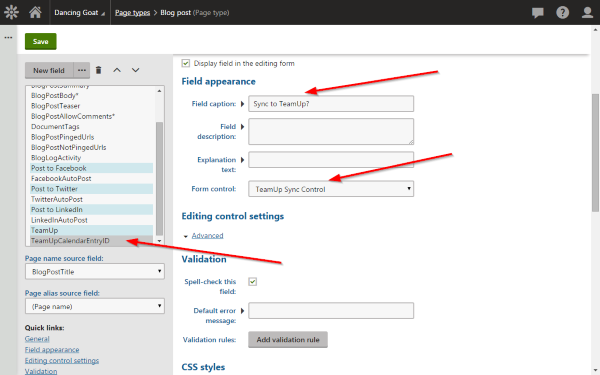
Creating the form control was a pretty simple process when using the Kentico documentation example. After creating, I add a field to the Blog post page type and set the control to my new form control.
Page Type Field
Adding the TeamUp logic
Now that I have my custom control, I need to add my TeamUp logic. This code is going to handle the integration with TeamUp to read and write data. Luckily, TeamUp has a Web API (currently in beta) available and I was able to get access by writing to their support. Through this interface, I will be able to create an event based on the page data directly in my TeamUp Calendar.
Properties
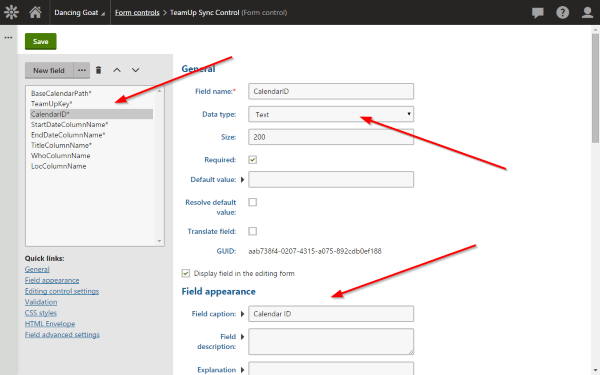
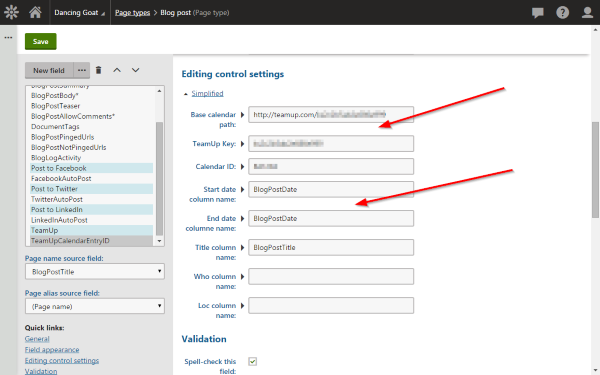
I created a number of properties on my form control to help set my calendar information. These properties are pulled directly from TeamUp and identify my login, my calendar, and other information about my account. When I added the form control to the Blog Post page type, I set these properties for the control.
Form Control Properties
Page Type Field Properites
In my form control, I create a property for each of these values that allow me to get/set them from within the portal UI. One other important piece is the Value property. For this, I will want to store an identifier for the synced event once it has been created in TeamUp. The actual value will come from TeamUp and be their ID for the event within their system.
ASCX Properties
   #region Properties

 /// <summary>
 /// Base TeamUp calendar path
 /// </summary>
 public string BaseCalendarPath
 {
     get
     {
         return ValidationHelper.GetString(GetValue("BaseCalendarPath"), "");
     }
     set
     {
         SetValue("BaseCalendarPath", value);
     }
 }

 /// <summary>
 ///
 /// </summary>
 public string TeamUpKey
 {
     get
     {
         return ValidationHelper.GetString(GetValue("TeamUpKey"), "");
     }
     set
     {
         SetValue("TeamUpKey", value);
     }
 }
Logic
Now that I have my properties set, it’s time to add the real brains of the control. I first add a simple interface to allow the user to see the current event, create a new event, or delete the event.
Design View
<asp:UpdateProgress ID="upp1" runat="server" AssociatedUpdatePanelID="up1">
    <ProgressTemplate>
        Loading...
    </ProgressTemplate>
</asp:UpdateProgress>
<asp:UpdatePanel ID="up1" runat="server">
    <ContentTemplate>
        <asp:Button ID="btnGetEvent" runat="server" Text="Refresh TeamUp Data" OnClick="btn_Click" CssClass="btn btn-primary" />
        <br />
        <br />
        <strong>TeamUp Event</strong><br />
        <asp:Label ID="lblEvent" runat="server"></asp:Label>
        <br />
        <br />
        <asp:Button ID="btnCreateEvent" runat="server" Text="Create Event" OnClick="btn_Click"  CssClass="btn btn-primary" />
        <asp:Button ID="btnDeleteEvent" runat="server" Text="Delete Event" OnClick="btn_Click" CssClass="btn btn-primary" OnClientClick="return confirm('Are you sure you want to delete this event?');" />
        <br />
        <asp:Label ID="lblMessage" runat="server"></asp:Label>
        <asp:HiddenField ID="hidEventID" runat="server" />
        <asp:HiddenField ID="hidEventVersion" runat="server" />
    </ContentTemplate>
</asp:UpdatePanel>
I’m a big fan of simplifying code and tend to use a single button click event handler for all of my controls. Here you can see how I determine the calling control and what methods to call.
Button Click Event Handler
protected void btn_Click(object sender, EventArgs e)
    {
        try
        {
            Button btn = sender as Button;
            switch (btn.ID)
            {
                case "btnGetEvent":
                    GetEvent();
                    break;
                case "btnCreateEvent":
                    CreateEvent();
                    break;
                case "btnDeleteEvent":
                    DeleteEvent();
                    break;
            }
        }
        catch (Exception ex)
        {
            EventLogProvider.LogException("TeamUpSYncControl", "EXCEPTION", ex);
            lblMessage.Text = ex.Message;
        }
    }
When the control loads, I want to display any events already associated with my blog post. I do this by calling the TeamUp REST service and querying it for the Blog Post Date. I then loop through all of the events for that day and look for the one that matches my saved event ID. If it matches the value I have saved, I then write out some data about the event and display it. I also hide the Create button but show the Delete button to allow the user to delete the synced event, if needed.
Get Event Method
protected void GetEvent()
    {
        lblMessage.Text = "";
        lblEvent.Text = "";
        bool blnEventExists = false;

        HttpClientHandler handler = new HttpClientHandler()
        {
            UseDefaultCredentials = true
        };

        using (var client = new HttpClient(handler))
        {
            client.BaseAddress = new Uri(this.BaseCalendarPath);

            client.DefaultRequestHeaders.Accept.Add(new MediaTypeWithQualityHeaderValue("application/json"));

            DateTime dtStart = ValidationHelper.GetDate(Form.GetFieldValue(this.StartDateColumnName), DateTime.Now);
            string strStart = dtStart.Year + "-" + dtStart.Month + "-" + dtStart.Day;
            DateTime dtEnd = ValidationHelper.GetDate(Form.GetFieldValue(this.EndDateColumnName), DateTime.Now);
            string strEnd = dtEnd.Year + "-" + dtEnd.Month + "-" + dtEnd.Day;

            HttpResponseMessage response = client.GetAsync("/" + this.TeamUpKey + "/events?startDate=" + strStart + "&endDate=" + strEnd).Result;

            if (response.IsSuccessStatusCode)
            {
                Task<string> tskResponse = response.Content.ReadAsStringAsync();
                string strResponse = tskResponse.Result;
                dynamic jresp = JsonConvert.DeserializeObject(strResponse);
                foreach (var item in jresp["data"])
                {
                    //determine if the id matches the current item
                    if (item.id == hidEventID.Value)
                    {
                        lblEvent.Text = "id:" + item.id + "<br />start: " + item.start + "<br />end: " + item.end + "<br />title: " + item.title + "<br />who: " + item.who + "<br />loc: " + item.loc;
                        hidEventVersion.Value = item.ver;
                        blnEventExists = true;
                        break;
                    }
                }
            }
        }
If there is no synced event for my blog post, I show the Create button to allow the user to sync it to TeamUp.
Clicking the Create button calls the CreateEvent mthod. This is the code that will create the event within TeamUp. I pull data from the blog post record and populate the appropriate fields for the TeamUp event. I then call the REST API and pass it the values, along with my Calendar ID and my TeamUpKey property. If all goes well, I should get a success response from the service and then display the newly synced event.
Create Event Method
var httpWebRequest = (HttpWebRequest)WebRequest.Create(this.BaseCalendarPath + "/events");
            httpWebRequest.ContentType = "application/json; charset=utf-8";
            httpWebRequest.Method = "POST";
            httpWebRequest.Accept = "application/json; charset=utf-8";

            using (var streamWriter = new StreamWriter(httpWebRequest.GetRequestStream()))
            {
                string evetnjson = new JavaScriptSerializer().Serialize(new
                {
                    cid = this.CalendarID,
                    key = this.TeamUpKey,
                    title = ValidationHelper.GetString(Form.GetFieldValue(this.TitleColumnName), "Sample Calendar Entry"),
                    start = strStart,
                    end = strEnd,
                    who = ValidationHelper.GetString(Form.GetFieldValue(this.WhoColumnName), ""),
                    loc = ValidationHelper.GetString(Form.GetFieldValue(this.LocColumnName), ""),
                    ad = blnAllDay.ToString().ToLower()
                });

                streamWriter.Write(evetnjson);
                streamWriter.Flush();
                streamWriter.Close();

                var httpResponse = (HttpWebResponse)httpWebRequest.GetResponse();
                using (var streamReader = new StreamReader(httpResponse.GetResponseStream()))
                {
                    var strResponse = streamReader.ReadToEnd();
                    dynamic jresp = JsonConvert.DeserializeObject(strResponse);
                    hidEventID.Value = jresp["data"]["id"].Value;
                    btnCreateEvent.Visible = false;
                }

                GetEvent();
            }
Clicking the Delete button is a bit simpler of a process. In the DeleteEvent method, I only need to pass the EventID and EventVersion values to the REST service. Once deleted, I reset my UI to show the Create Event button again.
Delete Event Method
var httpWebRequest = (HttpWebRequest)WebRequest.Create(this.BaseCalendarPath + "/events/" + hidEventID.Value);
            httpWebRequest.ContentType = "application/json; charset=utf-8";
            httpWebRequest.Method = "DELETE";
            httpWebRequest.Accept = "application/json; charset=utf-8";

            using (var streamWriter = new StreamWriter(httpWebRequest.GetRequestStream()))
            {
                string eventjson = new JavaScriptSerializer().Serialize(new
                {
                    id = hidEventID.Value,
                    ver = hidEventVersion.Value
                });

                streamWriter.Write(eventjson);
                streamWriter.Flush();
                streamWriter.Close();

                var httpResponse = (HttpWebResponse)httpWebRequest.GetResponse();
                using (var streamReader = new StreamReader(httpResponse.GetResponseStream()))
                {
                    var strResponse = streamReader.ReadToEnd();
                    dynamic jresp = JsonConvert.DeserializeObject(strResponse);
                    hidEventID.Value = "";
                    GetEvent();
                    lblMessage.Text = "Event Deleted!";
                }
            }
Note
TeamUp requires the Event ID and the Event Version to delete an event. I get the Event Version in the GetEvent method and store it in a hidden value for future posts.
Event Version Code
if (response.IsSuccessStatusCode)
            {
                Task<string> tskResponse = response.Content.ReadAsStringAsync();
                string strResponse = tskResponse.Result;
                dynamic jresp = JsonConvert.DeserializeObject(strResponse);
                foreach (var item in jresp["data"])
                {
                    //determine if the id matches the current item
                    if (item.id == hidEventID.Value)
                    {
                        lblEvent.Text = "id:" + item.id + "<br />start: " + item.start + "<br />end: " + item.end + "<br />title: " + item.title + "<br />who: " + item.who + "<br />loc: " + item.loc;
                        hidEventVersion.Value = item.ver;
                        blnEventExists = true;
                        break;
                    }
                }
            }
Testing the functionality
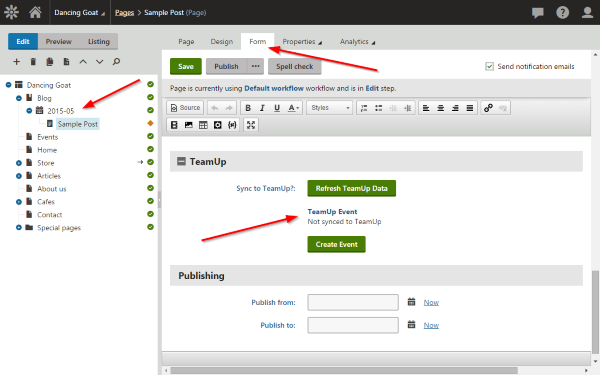
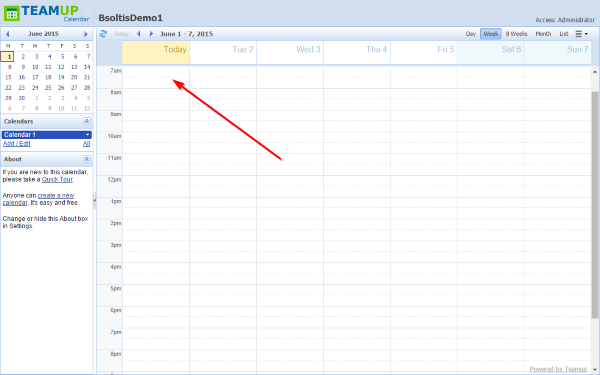
Now it’s time for the fun stuff, testing! I create a new blog post and view that no event is synced to TeamUp.
No Event Synced
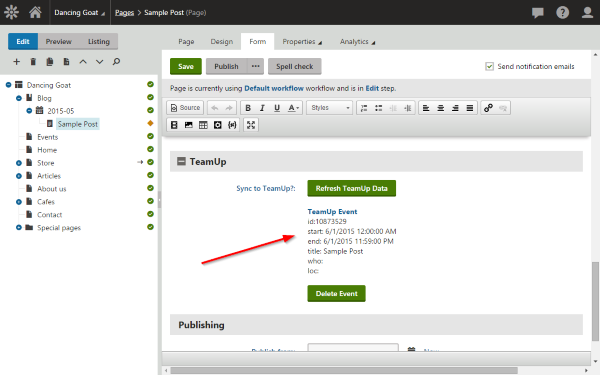
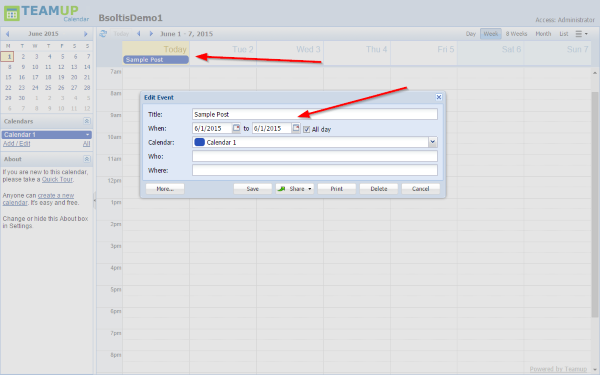
I click Create Event, which will then sync the event to TeamUp using the values from my blog post.
Create Event
Maybe I didn’t have my calendar ID set, and it added to the wrong calendar! Clicking the Delete Event button should remove it from TeamUp.
Delete Event

Wrapping Up
That’s it! With that simple control, I can now sync my events to TeamUp very quickly during the page creation process. Because I have different properties on the control itself, I can easily add this toanother page type and sync those events to a different calendar.
Hopefully, this blog shows you how you can leverage custom form controls to accomplish your project goals. And if you are using TeamUp, it’s a great example of how to integrate the two systems. Good luck!
Download TeamUp Form Control
This blog is intended to demonstrate one of many ways to accomplish this task. Always consult the Kentico Documentation for best practices and additional examples.