Creating a ReactJS Site with Kentico Cloud
By now, you’ve probably heard a lot about Kentico Cloud and how it presents a new way to develop your applications. One of the greatest benefits of the platform is how you can quickly develop applications in nearly any language and leverage cloud-based content. In this article, I’ll show you how I recently used Kentico Cloud and ReactJS within an MVC site for a tournament website for our booth at CodeMash 2017. Oh, and of course it's deployed to Azure Web Apps!
Background
As a technical evangelist, I often attend conferences and user groups around the world. I, like many of you, have aimlessly wandered around miles of conference booths and setups looking for the coolest swag and presentations. Most recently, Kentico sponsored CodeMash 2017, and MVP Brian McKeiver and I manned our booth for the conference.
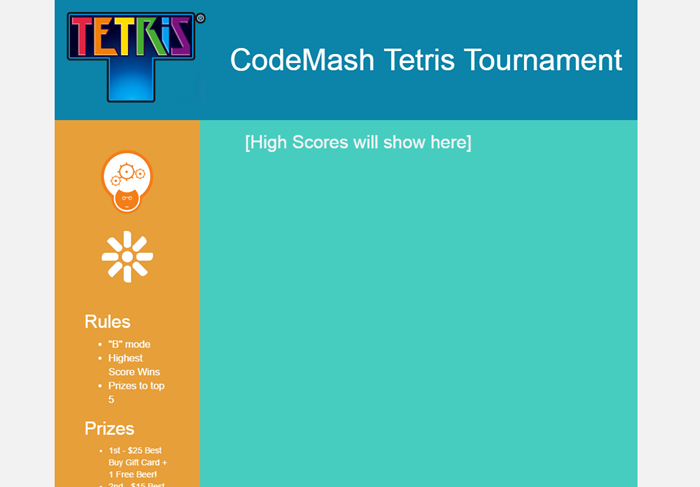
In an effort to set us apart from the other vendors, we decided to set up a Tetris Tournament for the attendees to compete in (who doesn’t love Tetris?!?). We would record the high scores and reward the winners with some gift cards and other choice prizes. Having the game setup at our booth also gave us the opportunity to talk to several developers about Kentico EMS and Kentico Cloud. But what would be the best way to start the conversation?
Planning
I knew I wanted to have an engaging experience for the conference, and the Tetris game certainly fit the bill. I also wanted to keep track of the scores in a simple way. The answer? Kentico Cloud! The platform would allow me to easily enter scores, and I could develop a simple application to display them. And to take it a step further, I decided to make the app powered by ReactJS to show how that was possible. With that solution in place, I would have a great way to introduce developers to the product and show them what’s possible. Even better, I knew I could create a site very easily for the event and be up and running quickly. Sweet, now I had a plan!
Creating the Kentico Cloud content
The first step of the process was to create my Kentico Cloud content. Because I would only be storing scores, this meant I only needed a single content type to hold the names and scores.
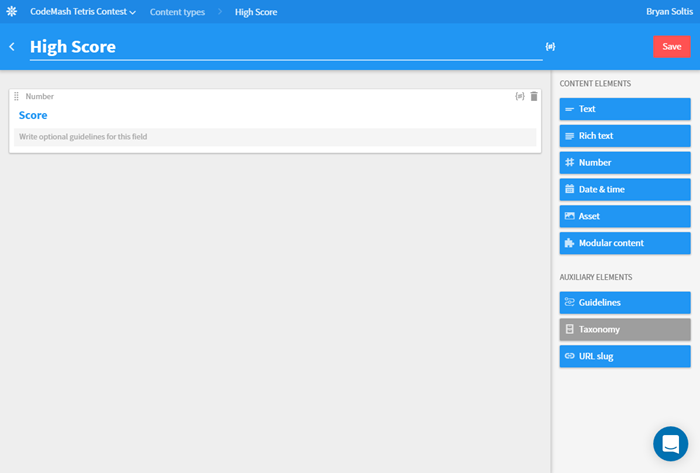
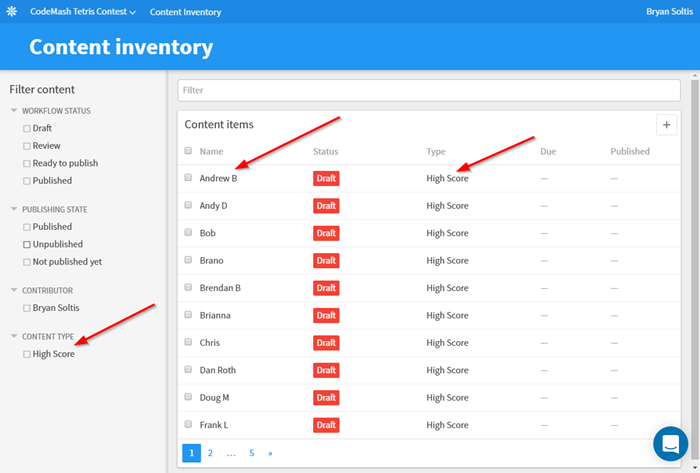
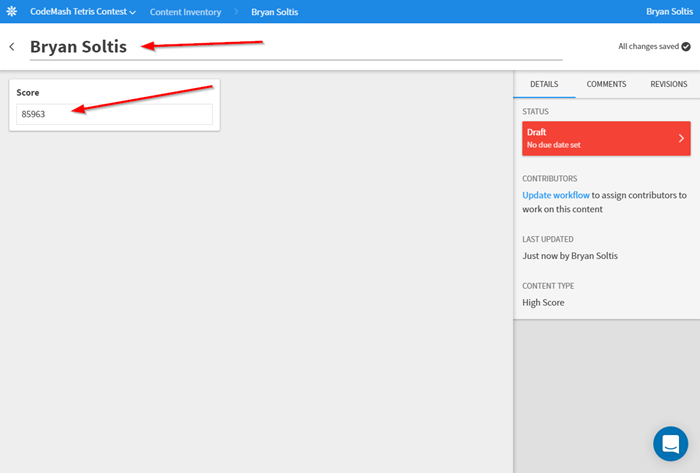
As players finished their game, we would enter these scores through the Kentico Cloud interface.
The MVC site
With the Kentico Cloud content type in place, I was ready make my application. In Visual Studio, I started with a blank MVC site template. I knew I would be adding ReactJS, so I didn’t really need another other components. I added a Home controller and view to hold my code and layout. In the Home view, I added some static HTML for the base layout (Yes, I know my design skills are amazing!).
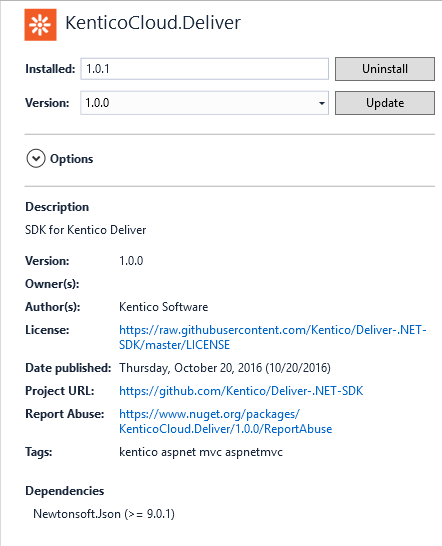
I added the Kentico Deliver NuGet package to get all the API goodies.
For the Home controller, I needed to add the functionality to pull the high scores using Kentico Deliver. To do this, I created a new class called HighScore.
public class HighScore
{
    public string Id { get; set; }
    public string Rank { get; set; }
    public string Name { get; set; }
    public double Score { get; set; }
}
In my Home controller, I created a List object to hold my scores.
private static readonly IList<HighScore> _highscores;
Then in the constructor, I created an instance of the list.
static HomeController()
{
    _highscores = new List<HighScore>
    {

    };
}
Next, I created a client to access the Deliver API.
private static DeliverClient client = new DeliverClient(ConfigurationManager.AppSettings["KenticoDeliverProjectID"], ConfigurationManager.AppSettings["KenticoDeliverPreviewAPI"]);
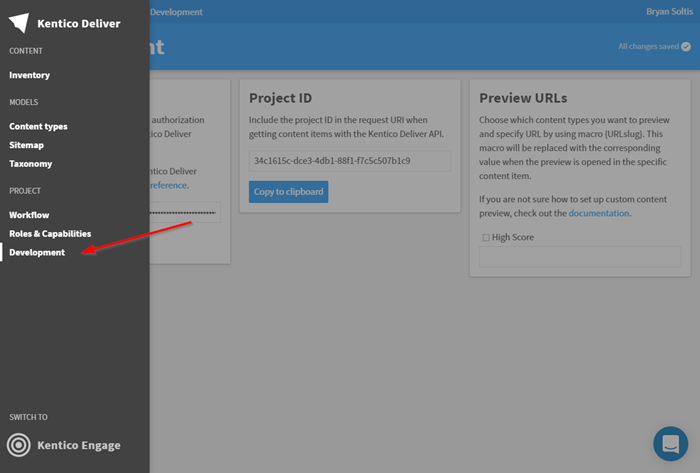
Note that I’m using the Deliver Project ID and Preview API Key to access the service. These can be retrieved by browsing to the Development tab within the Kentico Draft interface. Also, I didn't publish any of the scores, so I had to include the Preview API Key to pull un-published items.

Because I knew the ReactJS code would need a way to get the scores, I created a new action called HighScores to get the data from Kentico Draft.
[OutputCache(Location = OutputCacheLocation.None)]
public async Task<ActionResult> HighScores()
{
    // Clear the list of high scores
    _highscores.Clear();

    var filters = new List<IFilter> {
        new EqualsFilter("system.type", "high_score"), // Fetch the high scores
        new Order("elements.score", OrderDirection.Descending) // We want to order them by their score
    };

    var response = await client.GetItemsAsync(filters);

    int i = 1;

    foreach (var item in response.Items)
    {
        try
        {
            HighScore highscore = new HighScore();
            highscore.Id = item.System.Id;
            highscore.Rank = i + ".";
            highscore.Name = item.System.Name;
            highscore.Score = item.GetNumber("score");
            _highscores.Add(highscore);

            i += 1;
        }
        catch(Exception ex)
        { }
    }

    return Json(_highscores, JsonRequestBehavior.AllowGet);
}
Note: I am using the Deliver API to sort the scores by descending values to get the top scores first.
Lastly, I added a div element to my view to load my ReactJS content.
<div class="container">
    <div class="row" style="background-color:#0C83A8;">
        …
        <div class="col-2-4" style="background-color:#47cdbf; color:#f2f2f3; padding:0 75px;">
            <div id="content"></div>
        </div>
    </div>
</div>
With that code in place, I was ready to add ReactJS.
Adding ReactJS
To add ReactJS to my solution, I opened the NuGet Package Manager and added the ReactJS packages. These packages would allow me to use .jsx files in my project.
After adding the packages, I created a new file to hold my ReactJS code (data.jsx). Because my implementation was very simple, I adjust added all of my code into this file.
Note: Instead of explaining every piece, I’ll just show you whole file and add some notes.
var HighScore = React.createClass({
    rawMarkup: function() {
        var md = new Remarkable();
        var rawMarkup = md.render(this.props.children.toString());
        return { __html: rawMarkup };
    },

    render: function() {
        return (
            <div className="row score">
                <div className="col-md-1">
                    <h2>{this.props.rank}</h2>
                </div>
                <div className="col-md-8">
                    <h2>{this.props.name}</h2>
                </div>
                <div className="col-md-3">
                    <h2>{this.props.score}</h2>
                </div>
            </div>
      );
    }
});

var HighScoreList = React.createClass({
  render: function() {
      var highscoreNodes = this.props.data.map(function (highscore) {
      return (
        <HighScore name={highscore.Name} key={highscore.Id} score={highscore.Score} rank={highscore.Rank}>
        </HighScore>
      );
    });
    return (
      <div className="highscoreList">{highscoreNodes}
      </div>
    );
  }
});


var HighScores = React.createClass({
    loadHighScoresFromServer: function () {
        var xhr = new XMLHttpRequest();
        xhr.open('get', this.props.url, true);
        xhr.onload = function () {
            var data = JSON.parse(xhr.responseText);
            this.setState({ data: data });
        }.bind(this);
        xhr.send();
    },
    getInitialState: function () {
        return { data: [] };
    },
    componentDidMount: function () {
        this.loadHighScoresFromServer();
        window.setInterval(this.loadHighScoresFromServer, this.props.pollInterval);
    },

  render: function() {
    return (
      <div className="highscores">
        <h1>High Scores</h1>
        <HighScoreList data={this.state.data} />
      </div>
    );
  }
});

ReactDOM.render(
  <HighScores url="/HighScores" pollInterval={10000} />,
  document.getElementById('content')
);
In this file, I’m added a few functions:
- HighScore: Sets up the HighScore class to define the structure / layout for each high score
- HighScoreList : Sets up a list of the HighScore objects
- HighScores: Adds the functionality to access a URL at a set interval to populate the list of scores
- Render: Renders the ReactJS code/output
The ReactJS code to piece it all together is the render function. In this one call, I specify the URL (my HighScores action in the Home controller) and the interval (10000 = 10 seconds). These two values are passed to the HighScores function are used to set the URL from where the scores are retrieved and how often.
Note: In order to get the /HIghScores page to load, I added the following to RouteCOnfig.cs file.
routes.MapRoute(
    name: "HighScores",
    url: "HighScores",
    defaults: new { controller = "Home", action = "HighScores" }
);
Lastly, I added references to the data.jsx and ReactJS files (using a CDN) to my shared layout.
<script src="https://cdnjs.cloudflare.com/ajax/libs/react/15.3.2/react.js"></script>
<script src="https://cdnjs.cloudflare.com/ajax/libs/react/15.3.2/react-dom.js"></script>
<script src="https://cdnjs.cloudflare.com/ajax/libs/remarkable/1.7.1/remarkable.min.js"></script>
<script src="@Url.Content("~/Scripts/data.jsx")"></script>
Hooking it all up
With all of the code in place, I was ready to F5 it and see the results. I confirmed the page loaded everything up and the scores were properly retrieved from Kentico Draft.
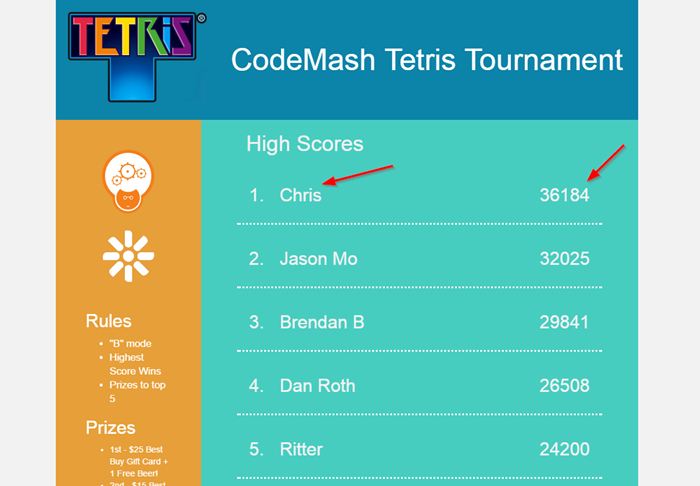
I then added an epic Tetris score I got, to make sure the ReactJS was working correctly. In Draft, I created a new content item for my score. (Don’t believe my score? Ask Brian McKeiver about it. He said I wasn’t allowed compete in the tournament.)
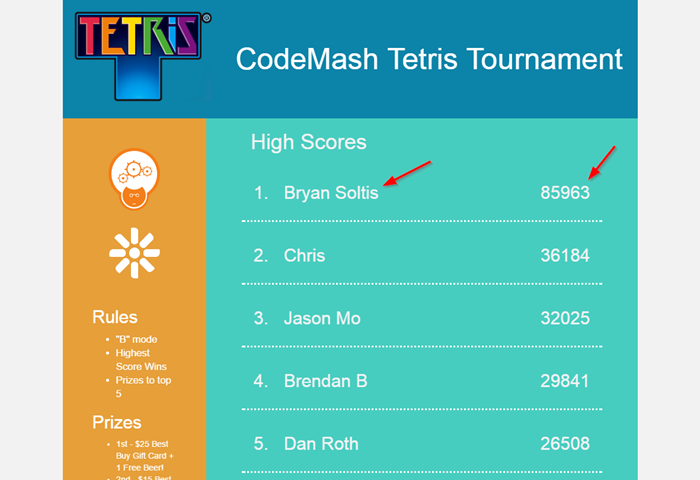
After entering the score, I switched back over to the site and waited for the ReactJS code to call the HighScores action. Once this completed, I confirmed the site updated with the new values.
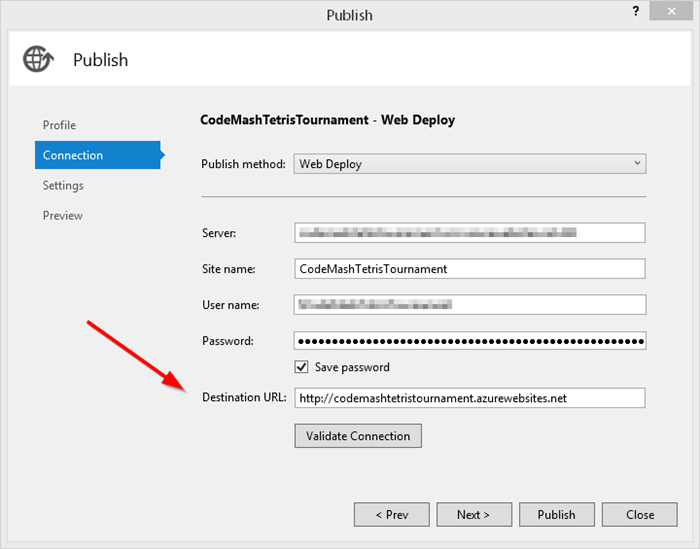
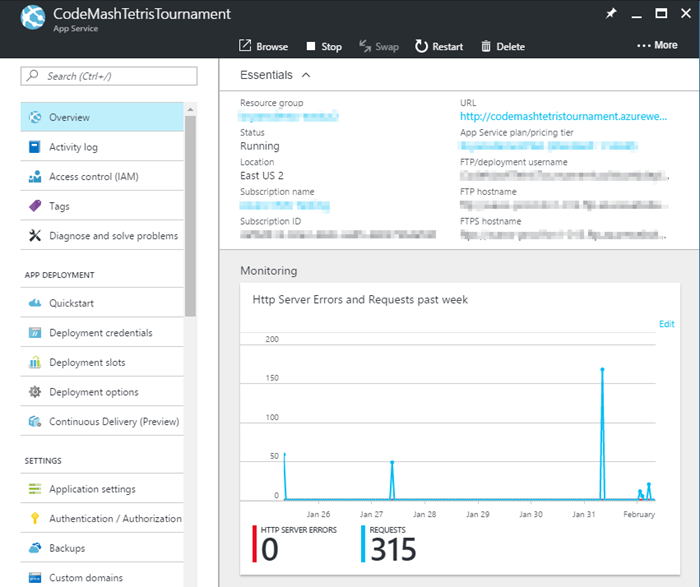
I then deployed the site to Azure Web Apps, to get it running quickly. Azure Web Apps are just about the easiest hosting I've worked with and I knew it would be a great fit for the site. To deploy it as soon as possible, I clicked Publish on the solution in Visual Studio and targeted my Web App.
If you want to check out the tournament site, view it here.
The stats
In case you wondering, here is the list of technologies and other information about the site.
- MVC 5 Web Application (.NET 4.6)
- ReactJS 15.3.2
- Kentico Delivery API 1.0.1
- jQuery 1.9.1
- Azure App Service (Web App)
- Kentico Cloud (High score data)
- Total time to build: approx. 4 hours
Moving forward
In this blog, I showed you how to quickly integrate Kentico Cloud with ReactJS. This solution was perfect for my scenario as I needed to build a site quickly and had some very simple content to display. Through Kentico Draft, I could quickly define my content and enter my scores. Using Kentico Deliver, I easily retrieved the values to display. Then with a little ReactJS functionality, I was able to set up the site to dynamically update scores automatically.
I hope this shows you what’s possible Kentico Cloud and different frameworks. Whether it’s a Chabot, micro-site, a full ReactJS site, or any other application you need to get up and running quickly, Kentico Cloud can help you produce your sites quickly. And when it comes to making a site for a conference, speed is the key. Now, time to go play some more Tetris. Good luck!
View the full source code
This blog is intended for informational purposes only and provides an example of one of the many ways to accomplish the described task. Always consult Kentico Documentation for the best practices and additional examples that may be more effective in your specific situation.