Localization pack installation
This article shows how to install a new localization pack.
Kentico CMS provides a simple mechanism to use a huge variety of languages for your administration interface – basically, we are using localization keys which may be translated via localization files (so called resource files). Those resource files are located in an application project folder under the ~\CMSResources folder. By the way, this is how the localization process is done in ASP.NET applications in general.
By default, there are just 3 languages in this folder (plus one installation resource file). In order to install a language of your preference, please go through the following 4 easy steps.
1. Package download
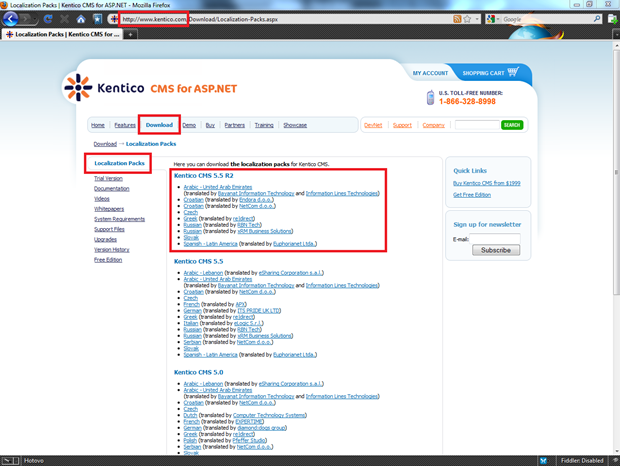
The very first step is to download the localization package. All available packages can be downloaded at:
Kentico.com -> Download -> Localization Packs. There are localization packs for the latest Kentico CMS release at the top of the shown page as well as for older versions underneath them. Please download the language package you want to use.

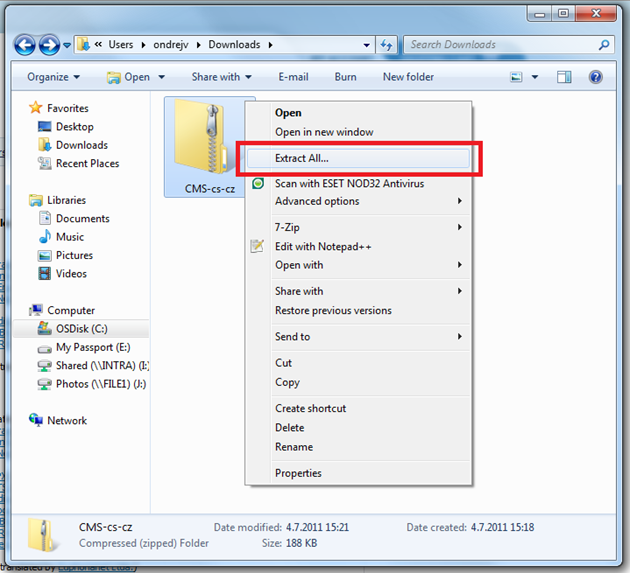
2. Unpack your localization package
On the file system, navigate to a particular downloads folder where you can extract that downloaded localization pack.

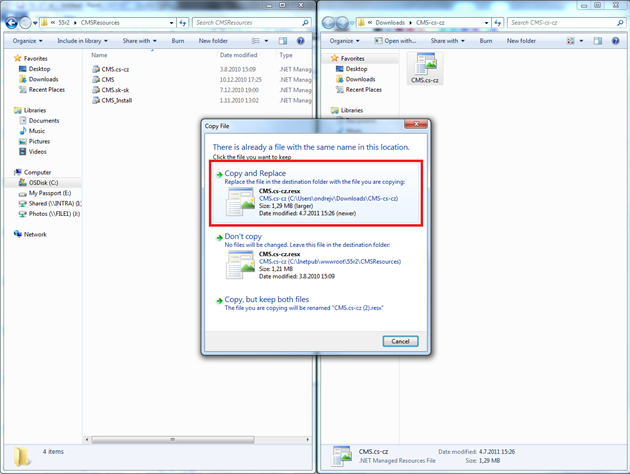
3. Copy it over
Now you are ready to copy the .resx file to the ~\CMSResources folder in your application root (most probably located in C:\\inetpub\wwwroot\<application_name>). It may happen that the same file (but older) exists in the source folder, so don’t hesitate to overwrite it. However, please bear in mind the customizations you’ve done to your original file – you’ll need to create particular records in the new file afterwards.

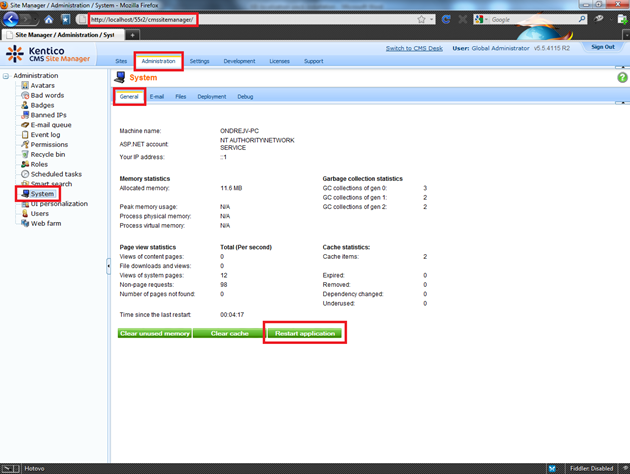
4) Restart the application
Finally, in order to make those above mentioned changes take effect, please restart your application. This way newly added translations from the resource strings will appear in the UI.

-ov-
See also: Multilingual and international support - overview
Applies to: all version of Kentico CMS