WebDAV and custom file extensions
With version 5.5R2 it will be possible to modify documents via the WebDAV protocol. I have been playing around with this feature and wanted to share some experiences that I have come across.
First of all you need to enable Windows Authentication if you want to have access to the WebDAV features. I definitely recommend Martin's post on how to enable Windows Authentication for your Kentico website:
Setting up Windows Authentication
If your Internet Information Services doesn't have the Window Authentication and/or the WebDAV extensions installed, then please read the following article which nicely summarizes the steps needed to enable these features for IIS 7.0 (which I used):
Installing and Configuring WebDAV on IIS 7.0
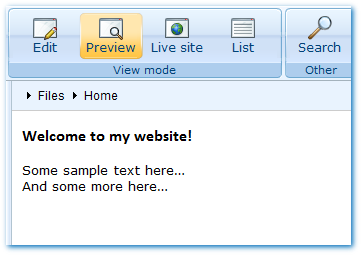
Having enabled the WebDAV for your website, login the "CMS Desk" and add a new file. In my case I am uploading a Microsoft Word document. The screenshot below illustrates this.
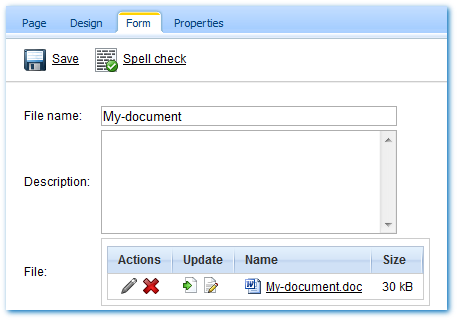
The screenshot shows a new icon in the update section which represents the new editing feature using WebDAV. If you click on the document it will be opened in the program that is associated to the .doc extension on your local computer. This of course only works if your client application supports WebDAV.
For more information on WebDAV and supported applications check out Martin's great post:
Kentico CMS and WebDAV support
From this point on I would like to talk a little bit more about how you can support some custom file extensions in combination with WebDAV.
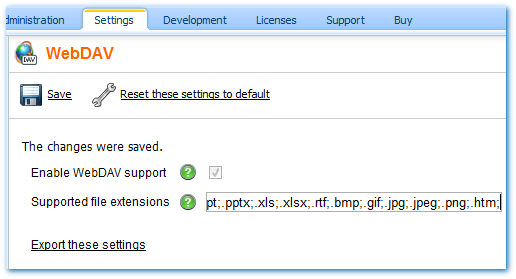
The first thing that you have to do is go to "Site Manager", Settings and select WebDAV. Add the file extension: .htm as shown in the screenshot below.
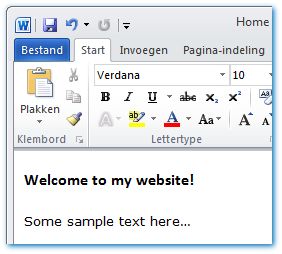
Next fire up Microsoft Word and create a new document. Add some body to the document and save it as a webpage (.htm).
Upload the newly created webpage to Kentico and notice that you can modify the file from your local computer.
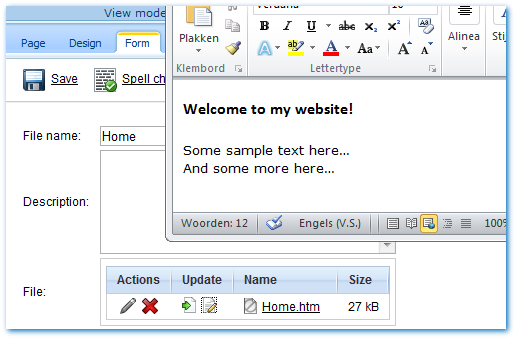
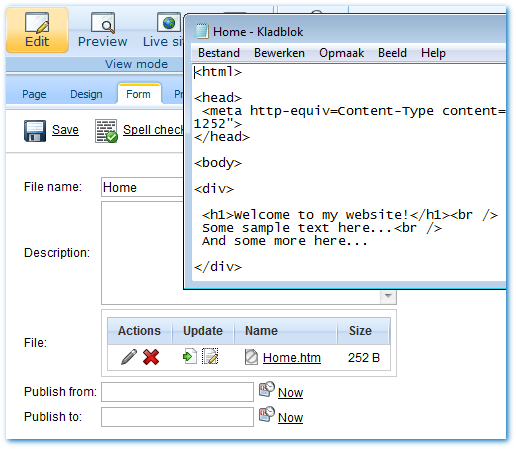
Modify and save the file and view the result:
If you would like to influence which application is being used for modifying the file on your computer, simply associate the desired, WebDAV supporting, application with the file extension on your computer. To illustrate this I have associated the .htm file to notepad. The following screenshot illustrates this:
That was basically all to it. To wrap it up: I have shared a couple of links for enabling WebDAV on your Kentico website, I have shown you how you can enable custom file extensions for WebDAV and I finished with the steps needed for influencing the client application used for editing via WebDAV. Hope this helps!