DIY: How to apply custom output filter
In this article, we will look at the extensibility of the output filter module and how you can customize it with your own code.
Hi there,
The version 5.5 is close to its release so I finally got some time to devote to my blog again. Good for you, because I decided to make a series of DIY (Do It Yourselves) articles, that will teach you some advanced stuff about Kentico
CMS.
Do not worry, none of them will be too complicated, I will keep the overcomplicated things to some later time ;-)
So the first one is about output filtering. Before we start, let's make some introduction to this module.
What is output filter?
Output filter is a standard ASP.NET HTTP module registered in your web.config:
<add name="XHtmlModule" type="CMS.CMSOutputFilter.OutputFilterModule, CMS.OutputFilter"/>
What it does is it makes additional changes to the output HTML of the page, typically to help you fix the HTML coding to better match the standards. Read this article about some details what it is capable of:
http://devnet.kentico.com/Blogs/Martin-Hejtmanek/January-2010/Optimization-tip--Write-better-code,-disable-Outpu.aspx
If you want to somehow apply your own, you basically have two options:
-
Implement your own filtering HTTP module, and use it, you need the Visual Studio for that, need to compile that, and also understand how HTTP modules and Output filters work. And you also only bind your code to the output stream, so you would need to stream the data to the string first and modify it. Not to mention, it can not work exactly as you want with output caching.
-
Use the Kentico CMS Output Filter events to customize it
Output filter events
There are just few events in the Kentico CMS Output Filter that you can use, however they are enough to make just anything you wish, they are all in CMS.CMSOutputFilter.OutputFilter class:
-
OnFilterCreated - There is an Output filter object assigned to every filtered request and this event fires upon creation of the Output filter object so you can customize every such filter independently. By default, the output filter applies to all live site pages, except for those configured in the Excluded URLs in the Output filter settings. We will need this event to attach our custom filtering function.
-
OnAfterFiltering - This event fires after the output of the page was processed by the Kentico CMS Output filter, and you can modify the output HTML in it. We will use this one in this example.
-
OnBeforeFiltering - Similar to above, but this one fires before the default filter takes action. So if you think your modifications should be filtered by the default filter too or you need to make additional changes to prevent the default filter not do something you don't want, use this one.
Apply the customizations
To apply the customizations, we just need to attach the events. To do it, we modify the file
~/App_Code/Global/CMS/CMSApplication.cs which is there for you as the customization point for application events (basically so you don't need to search the exact location in Global.asax.cs, and also because these customizations can be exported to package and imported). Make sure the following code goes to this file, the
AfterApplicationStart is already there so replace it, we use it to bind the global static event for filter customization.
/// <summary>
/// Fires after the application start event
/// </summary>
public static void AfterApplicationStart(object sender, EventArgs e)
{
// Add your custom actions
CMS.CMSOutputFilter.OutputFilter.
OnFilterCreated += new CMS.CMSOutputFilter.OutputFilter.OutputFilterHandler(OutputFilter_OnFilterCreated);
}
/// <summary>
/// Runs after the filter for given request was created
/// </summary>
/// <param name="filter"></param>
static void OutputFilter_OnFilterCreated(CMS.CMSOutputFilter.OutputFilter filter)
{
filter.
OnAfterFiltering += new CMS.CMSOutputFilter.OutputFilter.CustomFilterHandler(filter_OnAfterFiltering);
}
/// <summary>
/// Runs after output filter finished its procesing
/// </summary>
/// <param name="filter">Output filter</param>
/// <param name="finalHtml">Output page HTML</param>
static void filter_OnAfterFiltering(CMS.CMSOutputFilter.OutputFilter filter, ref string
finalHtml)
{
System.Text.RegularExpressions.Regex re = RegexHelper.GetRegex(">[^<>]+<");
finalHtml = re.Replace(finalHtml, TextReplacement);
}
/// <summary>
/// Does the replacements in the plain text
/// </summary>
/// <param name="m">Match to process</param>
static string TextReplacement(System.Text.RegularExpressions.Match m)
{
return m.ToString().Replace("Corporate", "Corporate®");
}
Let's see what this code does:
-
After the application started (was initialized), we say that every created filter should call OutputFilter_OnFilterCreated method.
-
When the filter object for the request is created, we say it should call filter_OnAfterFiltering method after it performs default actions.
-
When the custom filtering method fires, we make the changes to the referenced outputHtml string, which is the complete output of the page.
-
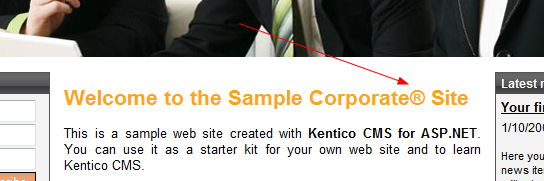
We make the regular expression replacement that matches all content between tags (very simple replacement for the plain text within HTML structure). In this example, we append ® to every CorporateSite word to make all such references in a correct format if the CorporateSite would be our registered trademark.
Then, if you save the file and display the Home page, you can see something like this:
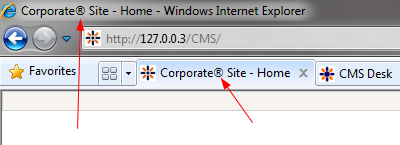
And also this (yes, since the Regex is very simple, it did replace it in the page title, too)
Here are some notes for you that you should consider if you do something like this:
-
This was a very simple example using very simple Regex, in the real world, you may deal with javascript tags or locations where you do not want to do such replacements, so you need to handle this in your code.
-
RegexHelper is a class that provides the cache for compiled regular expressions, that is why I could use the Regex directly in my code and didn't need to make it globally static for better performance. Especially if you make some Regex dynamically and can have several variants, it can be useful.
-
Custom filtering applies only when the output filter itself is applied. If you disable only parts of it, it will work, but if you disable it as a whole, it won't fire the events.
-
For output caching enabled, the filter event fires only on first load of the page, and your modifications are part of the output cache, too.
MOST IMPORTANT: Output filter is not a best way how to modify the HTML of the page, because it must deal with the complete HTML output which can be quite heavy. It is typically a mean of fixing something that a lazy content editor didn't do. It can save you some time but you should decide if the time saved is worth the additional overhead. Output filter itself doesn't use too much overhead (the overhead is caused by its particular parts), but your custom filtering may be quite CPU or memory intensive, so be careful with it.
One last tip, try to add following code to the OnAfterFiltering method:
System.Text.RegularExpressions.Regex reb = RegexHelper.GetRegex("\\s\\s+");
finalHtml = reb.Replace(finalHtml, " ");
And see how your output HTML was compressed by removing all the unnecessary spaces:
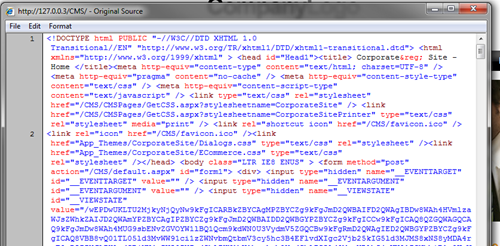
As always, be careful since some of your HTML or javascript code may actually need them ;-)
Enjoy your weekend and look forward to next tips